
Here is episode 3 in my 'what can I do for you to make you a better photographer and suck less' series. I goes a little like this:
I'm a bit rusty on this, but I've noticed that:
Nobody is using their supplied software to PP their picts.
A lot of people are letting their hosting site resize their picts at upload.
They're PP'ing with their host sites software
If they are PP'ing, they're not fixing sharpness or contrast after resizing.
Any thoughts on this? Since I'm a "hobbyist only" on this, my PP flow may not be optimal. Plus it will help those that really do wish to improve.
- I'wanna B. Better
Well let me start off with this: Post production (pp/PP) work-flow is a lot like cooking.
There are a lot of dishes that can be prepared from the same ingredients, it is knowing how to add them and in what quantities that make the food fab or fail.
- Some folks can't cook or choose not to learn.
- If the final result of your image is not that important, then maybe frozen dinners are the best option for you. Not very flavorful and all the great, but filling non the less. They get the job done.
- Some folks cook ... and never should till they have/take a few lessons.
- There is not much worse to a pp artist then to see an image that has been over worked and ruined by a misuse or to often, overuse, of a method. Mostly it is sharpening that gets overdone.
- Think of it as salt. A little bit can go a long way. Too much, and the image is no longer palatable.
- Cooking is an art form when done right.
- This is self explanatory.

- With some skill you can make a crap dish still appealing if you know what your doing.
- This comes down to mostly one thing: practice, practice practice. Know your 'tools' an use the right one for the job at hand.
- A skilled (well trained or self taught) pp artist can make a fail image fab with a bit of clever manipulation.
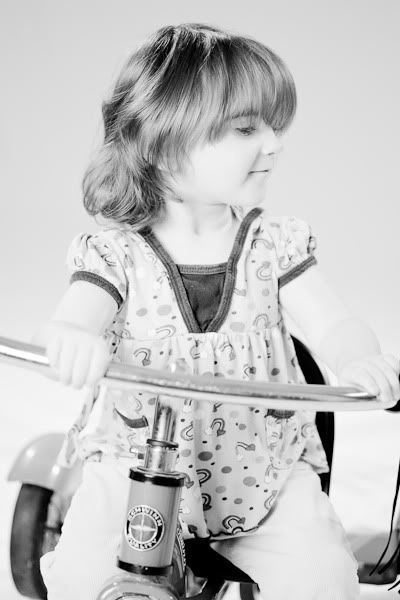
- EXAMPLE: Before and the After.
- Knowing when to add certain ingredients is paramount as well as how much.
- Salt is to cooking as sharpening is to pp work. More on this later ...
- Good prep work needs to be done before to make the process smoother.
- Before diving in to the the deep pp processes (spot removal, dust and scratches, removing blemishes) make sue you have covered the basic pp areas first. More on this as well.
- Start off with small amounts and add more if needed. It is far easier to add more spice then to try and remove it.
Again a no brainer.
Okay, on to the meat of this post and to address the question/statements above.
| Quote: Nobody is using their supplied software to PP their pics |
First, we need to know if this is an if/then statement. Say:
IF Nobody is using their supplied software to PP their pics. Why not?
... or ...
Since nobody is using their supplied software to PP their pics then they most be using something else.
In this case, I think it is the first option. If I may interject my understanding of that statement, it would go as follows.
Just about every camera on the market comes with software that allows you to modify your images in some way. Why aren't the people using it to make their images look better? It doesn't make any sense.
I agree.
If you want your images to look as good as you can make them, with little to know deep pp knowledge, then one should be using, at lest, the SW that came with your camera. It is usually very user friendly and easy to understand. Pretty much all SW now comes with a help file that explains what it is that each of its functions does and how to best use said function.
The typical SW package will allow the user to do at least some basic editing of their images - the image modifications that a primarily used by the general user. Saturation, contrast, gamma, brightness, crop, rotate, sharpening, color conversion (B&W, sepia, etc.) and a couple others. The higher end cameras will often come with better SW, allowing for greater control of the creative/pp process.
Play with your SW. Even if it is just for an hour or two. If the program comes with a tutorial - go through it. Use an image that you really don't care about as your practice shot. Just remember, there is [almost] always the
UNDO button.
| Quote: A lot of people are letting their hosting site resize their picts at upload. |
In my opinion, this is bad. Period. For one you have no control over the end result. Secondly, most services go for file size NOT image quality. The result is a small, over compressed, partially desaturated, un-sharp, artifact riddled image who's colors are not accurate to the original.
To get good results, you need to do your own resizing and when saving, set the JP(E)G compression settings yourself. From 1-100, I never go below 70 for my JPG quality. To me, any setting lower then that gives unexceptionable results.
| Quote: They're PP'ing with their host sites software |
Some sites do have this option. For example,
Photobucket does. I can not say that I have used it, but I do see that it is there should I want to. I use p-bucket myself for most of my web-posing images. Why? They're free, they give you TONS of space, they're fast and (going to the previous question) they don't re-sample your images. What you put up there is what you get in return.
Remember this about JPG images and online editors: JPG's use a
lossy image compression.
(The smaller the file, the more of the images original 'data' is lost in the process) Now, if you upload a JPG to your hosting site, it has already been compressed - either by you in a SAVE AS: JPG action, or by your cameras default file type. If you then edit this image online, the resulting file will now have been compressed twice, resulting in a greater loss of data and quality.
Think of it this way: a JPG image is like a soda can that you smashed flat to make it smaller for storage. When you edit a JPG image you are, in essence, expanding that can again. This time, it has wrinkles, folds and bends in it that it did not start with. You do your thing and save it as a JPG again - adding more damage to it and further decreasing it's quality. Eventually, if you do this enough, your can is no longer viable and is ruined - the quality has been degraded to such a point that it is hard to see what the original can even looked like.
Re-sample once. Save once.
QUICK NOTE: there is a difference between resizing and resampling. You resize an image in a photocopier by blowing it up or making it smaller. Any bad spots are made more obvious in the process.When you resamlple an image, it is more like you're redrawing it from scratch - just smaller or larger than the original. | Quote: If they are PP'ing, they're not fixing sharpness or contrast after resizing. |
This is important and I will address it now along with what I use as my PP workflow. Here are the steps I take and the order I take them.
NOTE: I use Lightroom 2.5 & Photoshop CS3 - Lightroom first, then Photoshop. For the moment, I will write the below as if I used Photoshop only. In the steps below that are adjustments to the 'look' of the image and that do not actually edit the pixels, I use ADJUSTMENT LAYERS. Never tweak the original if at all possible.
1) Noise reduction. If it needs it, that is. I use two different reducers. Noise Ninja and Noiseware. NN works (ideally) with profiles that are for your specific camera. Noiseware does 'learned' profiling and had FAR more options for fine tuning the removal.
2) Color correct your images. It is best to start off correct rather then to try and fix. I use a gray card. They are cheap and easy to use. If you can afford them, a Gretag MacBeth Color Chart or the awesome Spyder Cube, are great too.
3) Adjust your brightness and contrast. A image that is too dark or too bright are just painful to look at. An image that has poor contrast can often look 'flat' and boring. I predominately use the LEVELS tool in photoshop. With it you can make the blacks black, the whites white and even fix color casts that are tinting the image.
4) Remove the dust, lint, hairs, scratches, blemishes, zits and whatnot from your images. In photoshop, this is best done with the HEAL tool - NOT the CLONE tool. The HEAL tool uses a source point. It extrapolates from it, and the destination area, to create a natural look that p-shop sees as the best combination of both. Works VERY well.
5) Selective adjustments. These are the ones that you do to only a portion of the image. Brighten the eyes. Whiten the teeth. Sharpen an area.
6) Resample to the size you want. For web postings, I usually go for a size between 500 & 800. They are large enough to see 'what is going on' and still provide decent detail, while staying within the confines of most forums image posting restrictions.
7) Sharpen for the web. Remember, like salt, a little bit goes a long way. On average I use SMART SHARPEN with a setting of around:Amount: 200%
Radius: 0.2 pixels
Remove: Gaussian Blur
This adds detail to the small areas w/o being overdone.
8) Use the SAVE AS to save the file. NEVER overwrite your original file. You may need it later.
9) Upload the file to a service that neither resizes/resamples nor recompresses your files. Both are, again, bad!
I hope that this information is useful and will help you to produce good quality images that you are proud to display.
Good luck!
 Lets start by setting the scene. It is Saturday morning and mom has been up since 7:00am - two hours earlier than normal because it is family picture day. The kids are dressed ... again ... and she is now in the process of getting her makeup on as dad chases the two year-old down the hall to retrieve her cherry scented lipstick before it is eaten or fed to the dog. The five year old tries to help dad but ends up running into the kitchen island, face first, instead. Dad finally nabs the two year old and both kids are now crying. One in pain and the other is just plain upset.


 FUNNY
FUNNY  TECH
TECH  MEDIA
MEDIA  MUSIC
MUSIC  RANT
RANT 


